Friday, December 18, 2009
Teacher Gifts
Teacher Gifts are so much fun for the princess. She loves to give her teacher a gift, and apparently she loves the reactions she gets because it's always handmade! This year I had to make one of these little altered notepads for her as well.
I decided to make one for each of the little prince's "teachers" as well.
So cute - they hold a pad of post-it notes inside. Perfect for throwing into your purse - never be without a scrap of paper again!!
I used 2 pieces of chipboard cut to 4x4, covered the fronts and backs of the chipboard with DSP. Used markers to colours the flowers, various brads to attach them. Spiral punch along the top of the "notes" piece and ribbon attached with Crystal Effects so it flips open.
Let me know what you think!!
I'll be back tomorrow with another "recycled Christmas" card!
Thursday, December 17, 2009
Recycled Christmas #11
As promised, here's a different version! I used much more of the original supplies, but to be honest - each time I made this card it was different. I finally decided to change the layout to "landscape", had 3 "ornaments" and dropped the pink rectangular piece and just stamped the greeting!
Sheesh! Who knew it would be so hard!?!?!
So, what's your opinion? Recycled Christmas #10 or #11??
See you tomorrow!
Wednesday, December 16, 2009
Recycled Christmas #10
This is was the MOST difficult card for me. I have had so much trouble with this set of supplies!
I'll show you the original just below, but this example has practically nothing of the original! Tisk, tisk on me, I suppose!
I love the concept of colouring the stamp with two different colours, but I don't think I hit the nail on the head with this particular design.
Here's the original...but I want to hear your suggestions on improvement!
Tomorrow I'll have another version that I came up with for your viewing enjoyment!
Tuesday, December 15, 2009
Recycled Christmas #9
Here's #9 in this series...I'm almost done my Christmas cards for this year. I'll have a few more examples to show you over the next few days, probably until the end of the week.
Right now I'm working on finishing the cards up and concurrently I'm designing some "teacher" gifts for the princess and the little prince to give this year.
That process is difficult, but only because there's a tonne of ideas running through my head!
Here's the original:
Practically identical, isn't it?
Monday, December 14, 2009
Recycled Christmas #8
Happy Monday to you!
I think Christmas cards should be simple. And even though simple could seem boring...there's still some work to every handmade creation, and no matter what - everyone appreciates that work.
Markers are at the heart of this creation, I stamped "NOEL" in black and coloured the letters and ornament. I took the ornaments from "Take Three" and coloured only a portion of the stamp in Almost Amethyst for the bottom portion. I added some Saffron ribbon along the side and I'm pleased with the outcome.
Here's the original:
I used pastels on the original, so the picture doesn't do it justice...
Sunday, December 13, 2009
Recycled Christmas #7
When I was trying to figure out how I would alter this set of supplies to become a little Christmas-y, I thought the original was a little too pink. I know what you're thinking..."Kim thought there was too much pink?! She'd never think that!" LOL!
So I flipped over the DSP to reveal some different colours and pulled from those colours and I'm happy with the end result!
Let me know how you're enjoying this series...even if you're not enjoying it - let me know and I can post some different creations! I promise, I won't be offended!!
Here's the original:
I'll be back tomorrow with another one...
Saturday, December 12, 2009
12 Days of Holiday Sales...
Some of the items introduced in this sale are new colours of Décor Elements vinyl sheets. There are 18 new colours to choose from, and they make great projects when you use them with Big Shot dies. Consider pairing the Clear Décor Elements vinyl sheets with the Tulipe Bigz die to create an etched-like design on a vase. Or use the Decorative Accent Bigz dies with the Old Olive Décor Element vinyl sheets to enhance a frame. The combination of Big Shot dies and Décor Elements vinyl sheets is sure to take your creativity to a new level!
If you would like to view what's available CLICK HERE and be sure to select me as your demonstrator to get preferred pricing and the best shipping prices!
See you tomorrow...
Recycled Christmas #6
I decided not to cut the grid for this variation, but I'm still happy with the outcome.
The "happy holidays" portion of the rub-on was in a long line so I found it was coming off on my fingers while I was trying to hold the other part to transfer it. Explains why only 2 sides were done, doesn't it?
Isn't the swirling snow pretty?
This is the last one for this colour combination/variation.
Check back tomorrow to see some new combinations!!
Have a great day!
Friday, December 11, 2009
Recycled Christmas #5
A variation, as promised.
This rub-on was one large snowflake that spelled out "let it snow". I think it's kinda cool after it's been "shattered" out on the grid.
Please, if you're feeling panicked about your Christmas cards this year...drop me a line. We can create beautiful yet simple cards for you!
See you tomorrow!
Thursday, December 10, 2009
Recycled Christmas #4
Some might say this is a little "goth", but I love the boldness of the colour combination!
When we originally did this card we used a bleaching technique. That technique did, however, prove troublesome! ;)
I used white rub-ons and transferred the sleigh, reindeer and snowflakes separately, then I cut the "picture" to create the grid.
I added the snowflake brad (which isn't SU!), but I love it.
Here's the original:
I'll have a couple more variations of this one. There's only so many of the same rub-on images in a package. Be sure to check back...
Wednesday, December 9, 2009
OMG! I forgot to post!
I'm really quite fond of how this one turned out, and so simple!
The only thing I added was a couple of "ice" rhinestone circle brads. I couldn't resist a little bling!
Still used the same set "Heard from the Heart" for the sentiment, but traded out last year's SAB for Serene Snowflakes.
Here's the original:
Tuesday, December 8, 2009
Recycled Christmas #2
New elements include Patterned Pines (which is a Level 1 Hostess set exclusive to the holiday mini catalogue), the Modern Label punch and Serene Snowflakes - also in the holiday mini. Oh and let's not forget the "merry & bright" from To You and Yours, which I believe is on the dormant list that will be retiring on 5 Jan 2010.
I think I might actually enjoy the Christmas version better than the original. But I do love, love, love the Choo Choo set in the original. Screams little boy!
I'm really enjoying this little project of mine - I find myself completing a couple of cards here, a couple of cards there. No stress, not mass producing and no cutting! Did I mention how much I love not having to cut anything!?!?
Here's the original:
Have a wonderful day!
Monday, December 7, 2009
Recycled Christmas?
You see, I'm a busy mom of two, who works full-time outside of the home, I work out 6 times a week between kickboxing, weights and cardio and spend most of my time exhausted. We're going on vacation soon and things around here are piling up.
And while I LOVE, LOVE, LOVE making my Christmas cards...something has got to give!
A while back I was running $10 card classes. All supplies were pre-cut par moi and you wonderful ladies came in, stamped, assembled and went away with some fabulous cards (if I do say so myself!). I still have some of those supplies left hanging around. I had thought I would sell them off as kits to those who wanted them, but as time flies by me...I've been putting it off and putting it off.
Well, 2 nights ago I decided it was as good a time as any for me to stick to what I love - stamping and assembling! UREKA!! No cutting required!! Whew! I really didn't think I was going to have the time to get this done!
This is the first card of a series, which I will call recycled christmas! Don't you love how you can simply change out the stamp set and the card has a completely different feel!?!
Does it look familiar now???
Monday, November 23, 2009
HUGE SALE FROM STAMPIN' UP!
You can place your order online or through me. Just let me know!
Happy shopping!!
Item | Description | Regular Price Sale Price | Discounted Price |
120280 | Framed with Love Bundle
| $59.90 $29.95 | $29.95 |
120281 | Thank You Kindly Bundle
| $41.90 $20.95 | $20.95 |
120976 | Thank You Kindly Bundle (French)
| $41.90 $20.95 | $20.95 |
120282 | Animal Crackers Bundle
| $35.45 $17.73 | $17.73 |
120283 | Corduroy Button Bundle
| $67.50 $33.75 | $33.75 |
120284 | Game Night Bundle
| $54.90 $27.45 | $27.45 |
120285 | Four Square Bundle
| $42.90 $21.45 | $21.45 |
120286 | Heart to Heart Bundle
| $69.85 $34.93 | $34.93 |
120310 | Heart to Heart Bundle (Spanish)
| $69.85 $34.93 | $34.93 |
120311 | Heart to Heart Bundle (French)
| $69.85 $34.93 | $34.93 |
120287 | Chipboard Letter Bundle
| $33.90 $16.95 | $16.95 |
120288 | Double-Stitched Ribbon Bundle
| $27.00 $16.20 | $16.20 |
120289 | Ultimate Stampers' Starter Bundle*
| $170.95 $102.57 | $102.57 |
120290 | Build-A-Brad Bundle
| $56.95 $34.17 | $34.17 |
120291 | Enjoy Every Moment Bundle
| $58.95 $35.37 | $35.37 |
120312 | Enjoy Every Moment Bundle (French)
| $58.95 $35.37 | $35.37 |
120292 | Cheep Talk Bundle
| $57.40 $34.44 | $34.44 |
120293 | Sock Monkey Bundle
| $78.40 $47.04 | $47.04 |
120313 | Sock Monkey Bundle (French)
| $78.40 $47.04 | $47.04 |
120294 | Alphabet Bundle
| $115.90 $69.54 | $69.54 |
120295 | Simply Said Bundle
| $73.85 $44.31 | $44.31 |
120314 | Simply Said Bundle (French)
| $73.85 $44.31 | $44.31 |
120296 | On Board Bundle
| $56.85 $34.11 | $34.11 |
120927 | Christmas Décor Bundle #1
| $100.85 $60.51 | $60.51 |
120298 | Christmas Décor Bundle #2
| $100.85 $60.51 | $60.51 |
120299 | Christmas Décor Bundle #3
| $100.85 $60.51 | $60.51 |
120300 | For All You Do Bundle
| $50.20 $35.14 | $35.14 |
120315 | For All You Do Bundle (French)
| $50.20 $35.14 | $35.14 |
120316 | For All You Do Bundle (Spanish)
| $50.20 $35.14 | $35.14 |
120301 | Striped Ribbon Bundle
| $71.70 $50.19 | $50.19 |
120302 | Bling Bundle
| $61.10 $42.77 | $42.77 |
120303 | Fresh-Cut Bundle
| $50.85 $35.60 | $35.60 |
120317 | Fresh-Cut Bundle (French)
| $50.85 $35.60 | $35.60 |
120304 | Pendant Note Bundle
| $53.85 $37.70 | $37.70 |
120318 | Pendant Note Bundle (French)
| $53.85 $37.70 | $37.70 |
120319 | Pendant Note Bundle (Spanish)
| $53.85 $37.70 | $37.70 |
120305 | Sporting Bundle #1
| $91.90 $64.33 | $64.33 |
120306 | Sporting Bundle #2
| $91.90 $64.33 | $64.33 |
120307 | Sporting Bundle #3
| $91.90 $64.33 | $64.33 |
114864 | Ginormous Flowers I Décor Elements | $53.95 $37.77 | $37.77 |
114863 | Ginormous Flowers II Décor Elements | $53.95 $37.77 | $37.77 |
112534 | 5/16" Neutrals Jumbo brads | $11.25 $7.88 | $7.88 |
112533 | 5/8" Neutrals Jumbo brads | $9.95 $6.97 | $6.97 |
112081 | Scallop Square punch | $22.95 $16.07 | $16.07 |
113693 | Full Heart punch | $22.95 $16.07 | $16.07 |
113694 | Heart to Heart punch | $22.95 $16.07 | $16.07 |
112091 | Scallop Edge punch | $22.95 $16.07 | $16.07 |
112571 | Circle Designer brads | $8.50 $5.95 | $5.95 |
112579 | Flower Designer brads | $8.50 $5.95 | $5.95 |
112572 | Star Designer brads | $8.50 $5.95 | $5.95 |
114785 | Small Wonderful Flowers Décor Elements | $53.95 $37.77 | $37.77 |
114786 | Medium Wonderful Flowers Décor Elements | $93.95 $65.77 | $65.77 |
114791 | Small Wonderful Leaves Décor Elements | $53.95 $37.77 | $37.77 |
114792 | Medium Wonderful Leaves Décor Elements | $86.95 $60.87 | $60.87 |
Friday, November 6, 2009
Cast-A-Spell DSP Birthday Card?
The person that received this card is probably used to it - his birthday is the 28th of October!
Simple, simple, simple. Cast-A-Spell DSP, two strips were cut at 1 1/4" x 3 1/4" and the middle strip is 1 1/4" x 4 1/4". There's a layer of Perfect Plum and then I stamped the sentiment from Full of Life in Basic Black onto Whisper White. The ribbon is Organza in Perfect Plum and Old Olive. I just twisted the ribbon so it was smaller looking (and less girly!) and tied two pieces of Old Olive onto the Perfect Plum.
On the strips of DSP, I coloured a tiny bit of the edges to be sure it stood out a little from the background piece of DSP.
We're heading into the weekend - yippee! And remember, next Wednesday is Remembrance Day - please take the time to remember soldiers past and present. Lest we forget.
Have a great Friday!
Thursday, November 5, 2009
Lovin' the stars!
I'm all about stars when it comes to masculine cards and I am losing mojo quickly! It seems I always fall back on my star punches - and they always come through for me!
This card was for a new co-worker's birthday this past month. I used Whisper White, Ruby Red, More Mustard and Old Olive. The Modern Label punch is in there, along with of course, the small & large star punches. I trimmed down the Old Olive star with my Paper Snips so that a sliver of the Ruby Red was showing through. The ribbon comes from Elementary collection of Ribbon Originals. Also included, 3 Soft Subtle Certainly Celery brads. No Earth Elements in this room to be found!
See you tomorrow!
Wednesday, November 4, 2009
A little "pop" of colour!
But, I was making a birthday card and felt a little morbid after a stamped a black cupcake!!
I decided to use my Stampin' Write markers to colour each of the letters in a different colour to make it "pop"! After I stamped that, I just knew I would colour the cupcake to reflect that same feeling.
Colours used are: Basic Black, Whisper White, Basic Grey, Real Red, Lovely Lilac & Green Galore. I used the 1 3/8" square punch for most of the squares, but had to trim down the far right squares to 1 3/8" x 1" to make them fit. I also used the new Modern Label punch for the sentiment and some silver brads to finish it off.
And I actually got a very nice compliment on the card from my husband! What's that all about!?!!?
Have a great Wednesday!
Tuesday, November 3, 2009
Pretty in Pink
Colours used are Whisper White and...you guessed it - Pretty in Pink. I embossed the image from Embrace Life in White, used the Scallop Circle punch, the 1 3/8" circle punch and one flower from the Trio Flower punch. Some fire circle rhinestone brads and some girlie pink ribbon. None of the ribbon came from Stampin' Up! I just have so much pink ribbon - I guess that's what happens when you have a little girl in your life! I stamped the "happy birthday" from Teeny Tiny Wishes in Basic Grey and used my Big Shot to dry emboss the background piece with the Elegant Bouquet textured impression folder as well.
I just LOVE Pretty in Pink!
See you tomorrow!
Monday, November 2, 2009
A going-away card
Good morning!
This card I made for a co-worker who was heading away on a course. It's difficult for me to make masculine cards to begin with, and there isn't many sentiments out there for the event, so this is what you get!
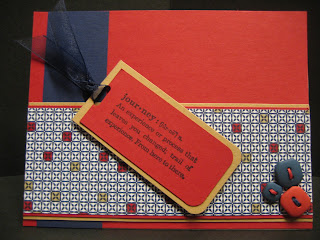
I used Define Your Life stamp set and the colours are Real Red, Night of Navy and Creamy Caramel. I coloured a few of the squares in Creamy Caramel and Real Red on the Night of Navy DSP to change it up a bit. I "thread" my buttons using tiny strips of co-ordinating card stock and the Corner Rounder punch for the tag.
The recipient actually said, "Did you make this? You're great competition for Hallmark!" I guess masculine cards aren't that difficult after all!
See you tomorrow!
Sunday, November 1, 2009
Long time, no blog!
These little beauties were fun to make, even though I hate mass-producing anything! The princess took these into her classroom - even though there's "no gum allowed". Silly me, I thought - no peanuts/no milk/no whatever - that would be good. Apparently not!
Anyhow, I used Sweet Centers stamp set along with the Sweet Treat cups. Soooooo cute! I cut the Pumpkin Pie card stock 6" x 3" and folded it in half to make a 3"x3" pouch. There's sticky strip holding the card stock together and the lollipop stick in. However, word to the wise - don't put a round peg in a square hole. They don't stay together all that well. They made it to school, so it's all good!
Check back tomorrow for a card!
Wednesday, September 23, 2009
Loving Brocade Blue
This card is fairly simple, as most masculine cards are...kinda like men themselves! ;)
I used Chocolate Chip DSP for the circles, popped them up with some dimensionals. The sizes are 1", 3/4" and 1/2". There's a couple of the 5/16" brads on there and I used a Texturz Plate for a piece of the chocolate chip background.
I was looking forward to playing with my new stuff, but only managed to get one set put together as my husband ended up home early. Besides, I was losing my "crafty" with every yawn.
I hope you have a wonderful Wednesday!
Tuesday, September 22, 2009
So little time...
I received a bonus from Stampin' Up! this month, $125 in free products - my choosing! How cool is that?
But, I've been so busy at work I completely forgot that it was scheduled to arrive today. And oh, how I love that man in brown!
Here's a little peek at what he delivered yesterday, but I simply ran out of time to play last night after my kickboxing class, preparing bottles, lunches, packing bags...you get the idea.
Be sure to check back tomorrow, I've got new stuff and a husband who's out ALL evening - yeah, me!
Have a great Tuesday!
Monday, September 21, 2009
Happy Birthday...
Here's the card I made for her to celebrate her day. I know what you're thinking...that's an awful lot of blue! It's her FAVOURITE colour, so I went all out!
It's a wee bit detailed, so here goes:
Colours used: Night of Navy, Brocade Blue, Bashful Blue and Whisper White
I used markers in Brocade Blue and Bashful Blue to colours random squares on the Night of Navy DSP. Cool effect, eh? I stamped out 3 cakes and the cake holder from the On a Pedestal stamp set in all three colours onto Whisper White card stock. Cut each of those pieces out and used Crystal Effects to secure the micro beads. Ribbon is 5/8" grosgrain in Brocade Blue & 1/2" striped grosgrain in Bashful Blue and I tied the two together at one end. There's tiny strips of co-ordinating card stock "sewn" onto the buttons (that little trick I showed you a little while ago), and 2 of those buttons are from Playground and the other, I'm not quite sure;) Stamped out happy birthday from the Birthdays Count (retired, but remember I told you - I don't care!) onto Whisper White and layered it onto Brocade Blue. I used mini glue dots to secure that piece and the buttons to the card. Finally, I coloured the candles in Brocade Blue & Summer Sun, cut them out and put a tiny bit of Crystal Effects on the flames.
And...that's it! Enjoy!
Sunday, September 20, 2009
Stars & Circles
Here's a card that I had to try out after I saw it in the new PaperCrafts mag!
Colours used are Whisper White, Night of Navy and Brocade Blue. I used some DSP from the Print Patterns III (hostess) in Night of Navy, 2 sizes of star punches and the 1 3/8" circle punch. There's one strip of Night of Navy that I sponged with White Craft ink and layered some 5/8" grosgrain ribbon on it. Popped the circles off with Pop-Up Glue Dots, a dimensional under each of the large stars. I used 2 silver brads to secure the small star to the large stars for the left and right ones and a rhinestone brad from the Pretties set to secure the centre one. Stamped a simple and elegant "happy birthday" in Night of Navy from "Birthdays Count". I don't care that it's retired, it's my absolute favourite Happy Birthday to use! ;)
Let me know what you think!
Friday, September 18, 2009
Inspiration in Action Challenge
When I found it, I just had to try it - plus, I needed a masculine thank-you card for a friend of mine.
Here is my version of the sketch:
The colours I used are More Mustard, Elegant Eggplant, Ruby Red and Soft Suede. I used Autumn Traditions DSP and watercolour paper. There's some paper-piercing and I popped the three leaves at the top using some dimensionals.
Awesome sketch Gretchen!
Thursday, September 17, 2009
Snappy Birthday!
So, I'm going to brag for a bit here...
This is the project we made for our Girls' Night Out club meeting on Tuesday night. Thanks Heather! I love the punched creations she comes up with - so awesome!
My princess also enjoys stamping, punching and crafting in general. Now that she's a little older, her and I have a blast playing together in my stamp room. Prior to Tuesday night's get-together, she wanted to create the project too! Of course, how could I resist my little sweetie!?
Here's her wonderful creation:
She literally did everything herself - just by looking at mine. The child just amazes me!
Enjoy your Thursday!!
Wednesday, September 16, 2009
A complete departure
Those who know me, know how much I LOVE blue and silver for Christmas. Well, I have the Night & Day Specialty DSP from the mini and just adore the window sheets. I wanted to use the Serene Snowflakes, but wanted to include the DSP as well. For me - this was crazy! Black on a snowflake!?!?! No, no, no, no!
Here's how it panned out:
I used Kraft, Bermuda Bay and Basic Black. I stamped the snowflakes in Bermuda Bay and popped out a 1/2" circle in Bermuda Bay card stock, on which I filled in some dots with my Basic Black marker. I took a 1 1/2" x 4 1/4" piece of Bermuda Bay CS for along the bottom, but needed to secure the Window Sheet to it! So, I punched some holes using my 1/16" hole punch and used a needle to help with the Linen Thread. The sentiment was done with markers (Merry in Basic Black and Christmas in Bermuda Bay). I sponged both the Kraft pieces on all the edges in Basic Black. And there's a couple dimensionals behind the sentiment piece as well.
Let me know what you think!
Tuesday, September 15, 2009
Love this Build-A-Bear
My princess took one look at this card and asked - "is this Kanda and Putter?" Kanda is her bear we made for her 3 years ago while Daddy was overseas and Putter is the new little guy we made for the little prince. I thought it was so sweet!
I used Rose Red, Elegant Eggplant, Old Olive and Whisper White. The stamped images are coloured with markers. I secured the sentiment with two "ice" rhinestone brads and while the picture doesn't show all of it, there's some paper-piercing on the card as well.
Ugh - they're just so stinkin' cute!
Have a great Tuesday!
Monday, September 14, 2009
Build-A-Bear
Well, Stampin' Up! has teamed up with Build-A-Bear Workshop and they're all in the new Holiday Mini Catalogue! There's tonnes of products to choose from, even for the Big Shot!!
And this month:
- Host a workshop totaling $330 (before s/h & taxes) or more and choose any one item* from the 2009 Holiday Mini Catalogue for only $14
When you're ready to book your workshop, just send me an e-mail!!
Have a great day!